Glossi automatically centers product shots on the full model, which is great for showcasing the entire product. However, to focus on specific model features, Glossi Studio employs a feature called Targets.
What Are Targets?
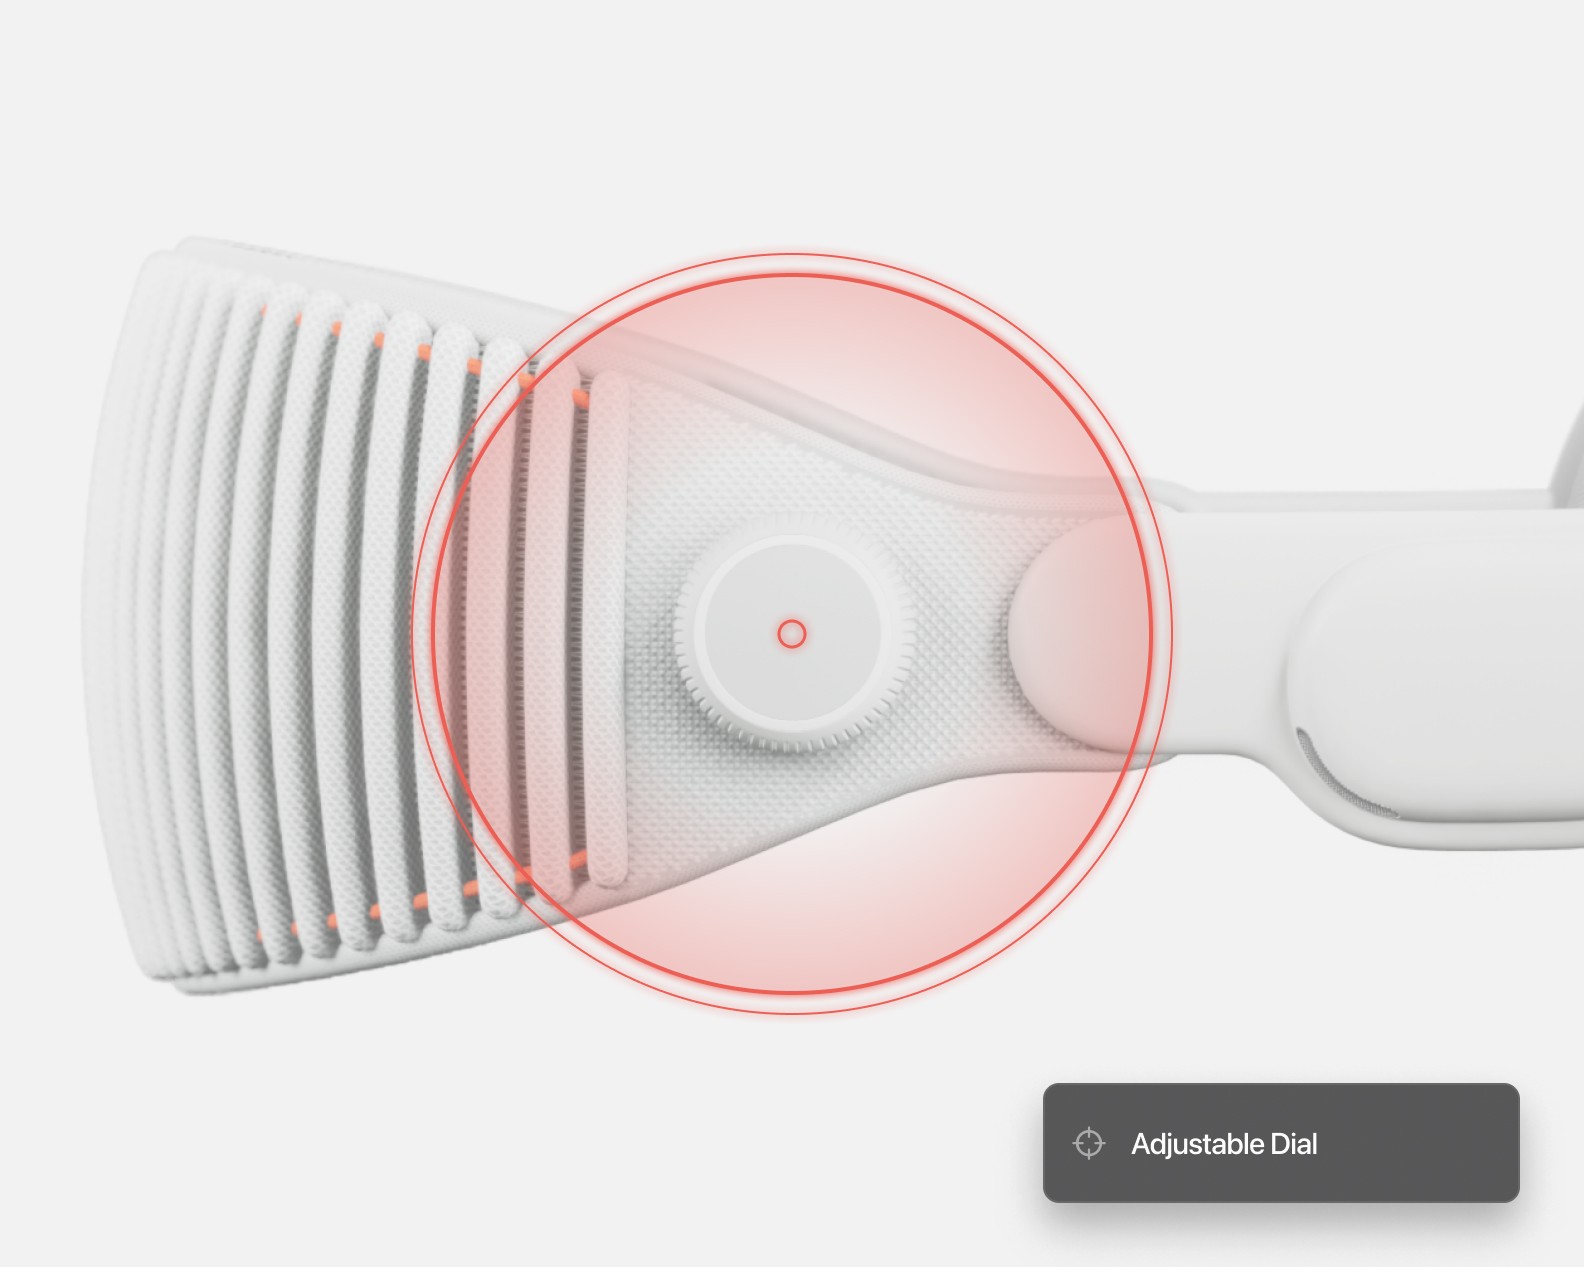
Targets pinpoint locations on a model, allowing shots to focus and orbit around them, serving as anchor points for camera movement. Editing shots to switch between multiple targets is straightforward, enabling the video to highlight of different product elements.
Adding Targets
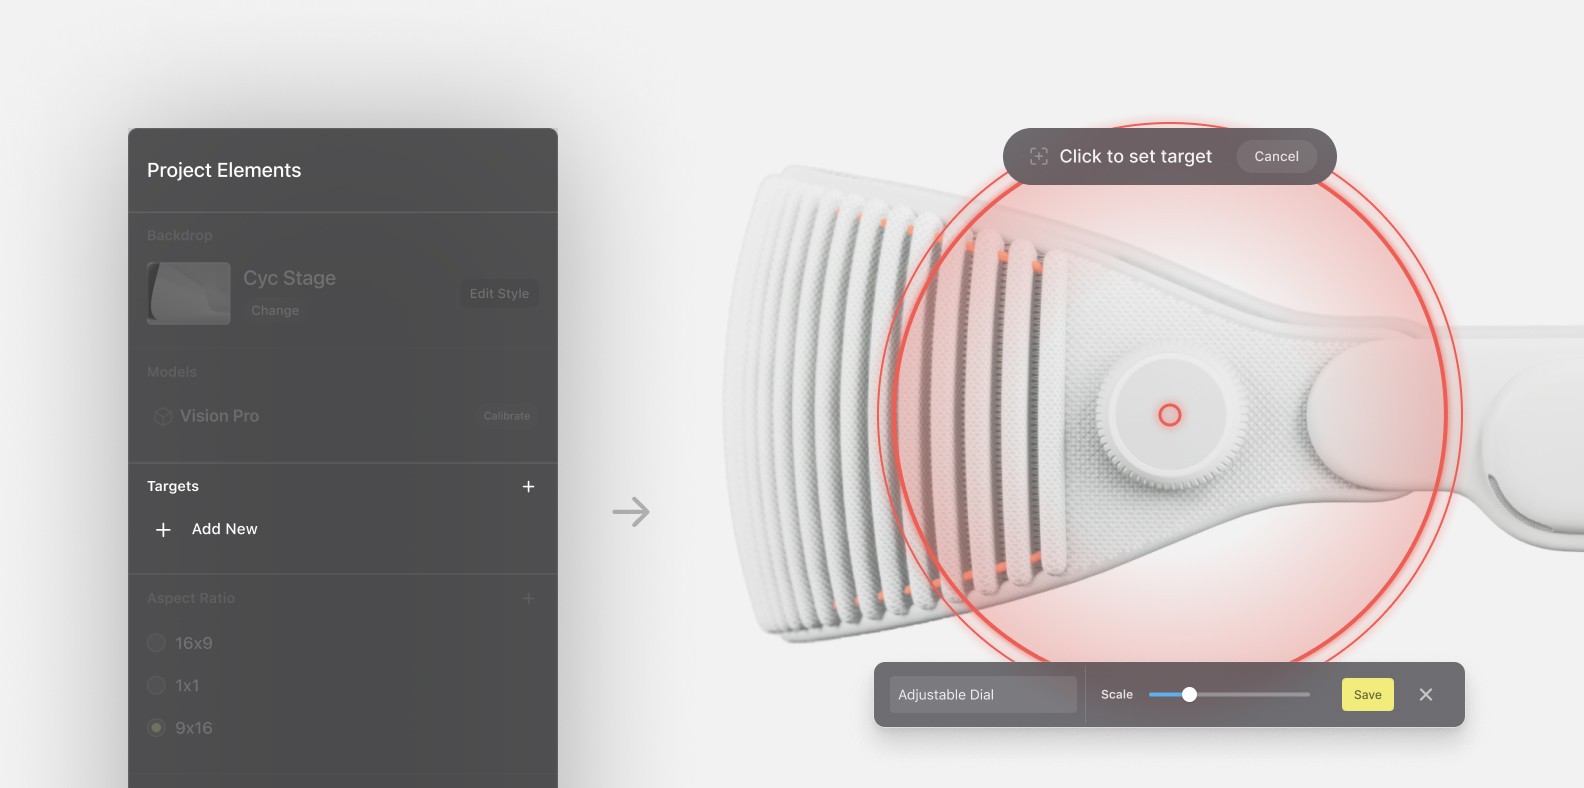
With a shot selected in video mode in Glossi Studio, the right sidebar will have property adjustments for each shot. Click the "+" under the "Targets" section on the right sidebar to add a target. Click on the model part you want to emphasize in the scene frame, attaching a target. Adjusting the "Scale" slider or dragging to rotate changes how the target appears in shots. You can rename targets for easier identification and editing later.
Using Targets in Your Shots
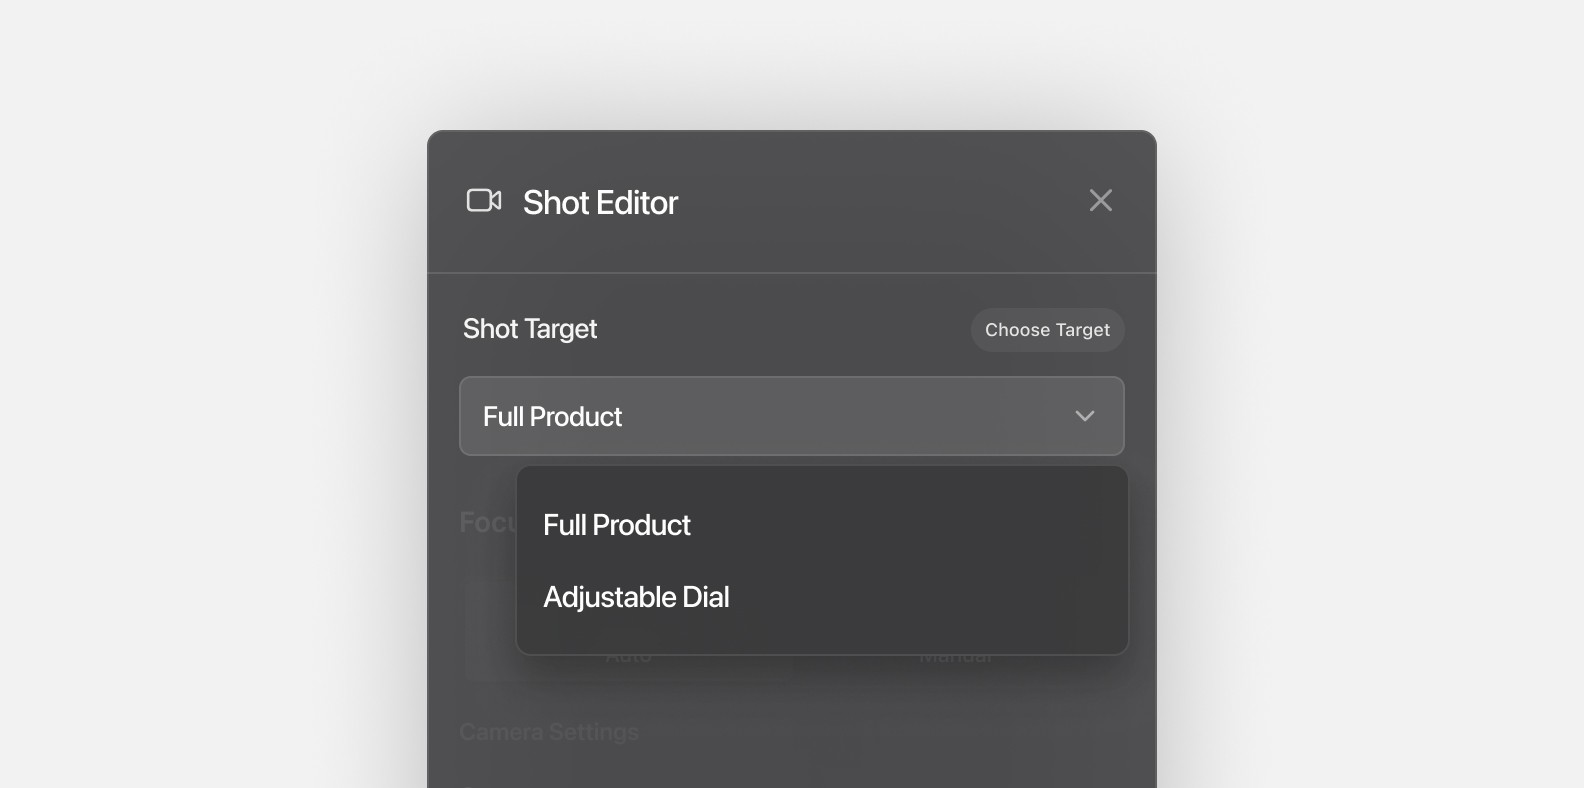
In video mode, select a shot to access its properties, including the "Shot Target," which centers the camera's focus. By default, it's set to the full product, but you can choose from your configured targets for focus adjustments.
For angle or zoom adjustments:
Global Adjustments with Target Configuration: To universally adjust the camera's zoom or angle for all shots using a specific target, edit the target's scale or angle. With nothing selected, the right sidebar will show the project elements. Select the target to adjust under the “Targets” section. Saving these changes propagates to any shot using that target.
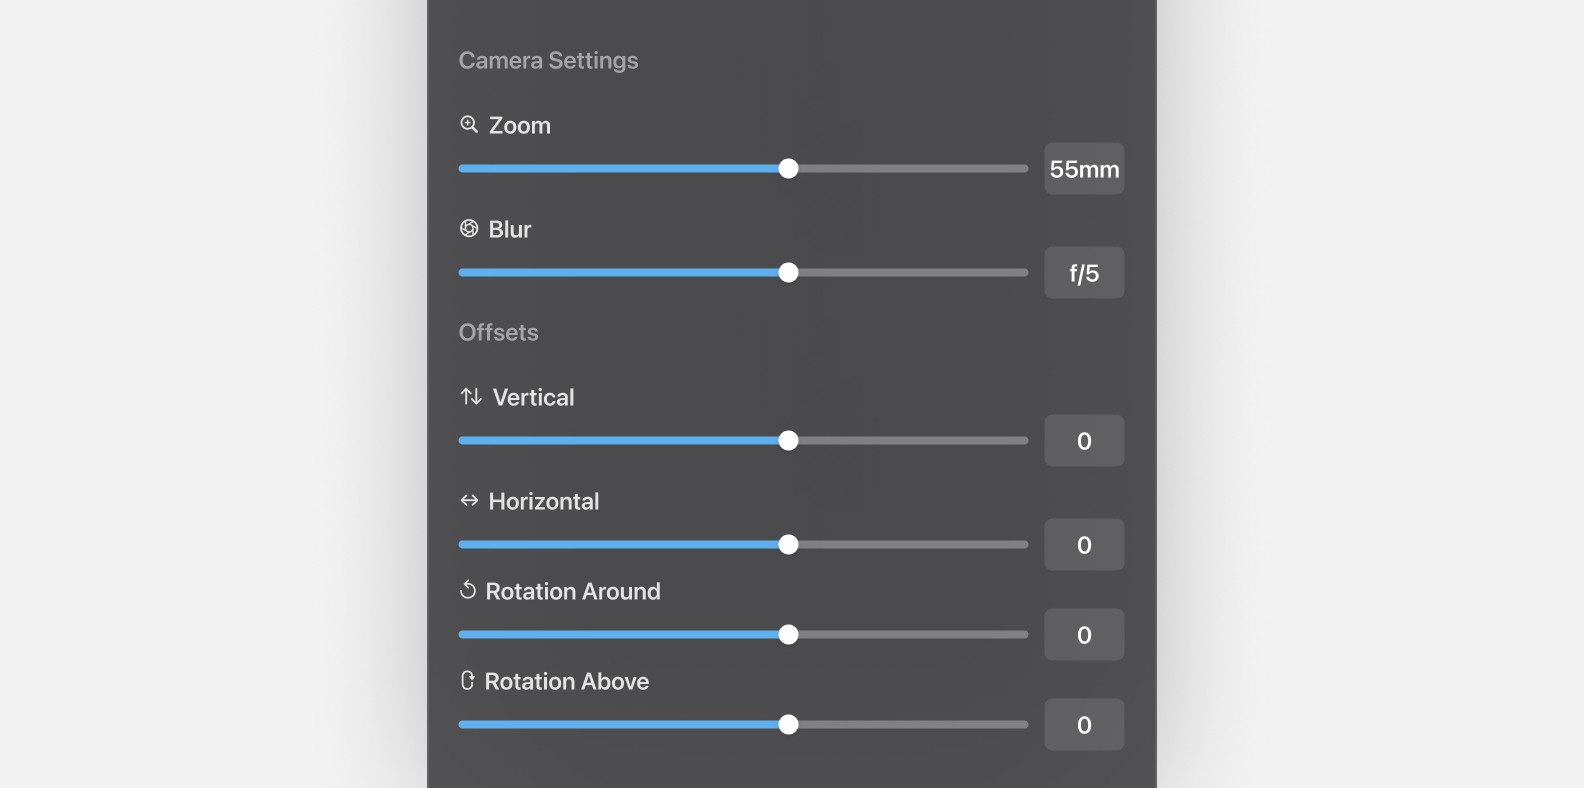
Local Adjustments with Camera Offsets: Modify camera offsets in the selected shot to adjust zoom or angle without affecting other shots. While a shot is selected, camera offsets can be modified at the bottom of the right sidebar
Best Practices
Begin with overall model views for context before focusing on details. Transitioning focus between targets within a video can narratively highlight product features, such as jewelry details or textile textures. Experiment to find what best suits your product's presentation.
Glossi automatically centers product shots on the full model, which is great for showcasing the entire product. However, to focus on specific model features, Glossi Studio employs a feature called Targets.
What Are Targets?
Targets pinpoint locations on a model, allowing shots to focus and orbit around them, serving as anchor points for camera movement. Editing shots to switch between multiple targets is straightforward, enabling the video to highlight of different product elements.
Adding Targets
With a shot selected in video mode in Glossi Studio, the right sidebar will have property adjustments for each shot. Click the "+" under the "Targets" section on the right sidebar to add a target. Click on the model part you want to emphasize in the scene frame, attaching a target. Adjusting the "Scale" slider or dragging to rotate changes how the target appears in shots. You can rename targets for easier identification and editing later.
Using Targets in Your Shots
In video mode, select a shot to access its properties, including the "Shot Target," which centers the camera's focus. By default, it's set to the full product, but you can choose from your configured targets for focus adjustments.
For angle or zoom adjustments:
Global Adjustments with Target Configuration: To universally adjust the camera's zoom or angle for all shots using a specific target, edit the target's scale or angle. With nothing selected, the right sidebar will show the project elements. Select the target to adjust under the “Targets” section. Saving these changes propagates to any shot using that target.
Local Adjustments with Camera Offsets: Modify camera offsets in the selected shot to adjust zoom or angle without affecting other shots. While a shot is selected, camera offsets can be modified at the bottom of the right sidebar
Best Practices
Begin with overall model views for context before focusing on details. Transitioning focus between targets within a video can narratively highlight product features, such as jewelry details or textile textures. Experiment to find what best suits your product's presentation.