Here's a step-by-step guide on how to export your 3D files as high-quality USDz files from Substance Painter, making them ready for upload into Glossi's system. This guide is designed for beginners, so we'll keep things straightforward and easy to follow.
Before You Start
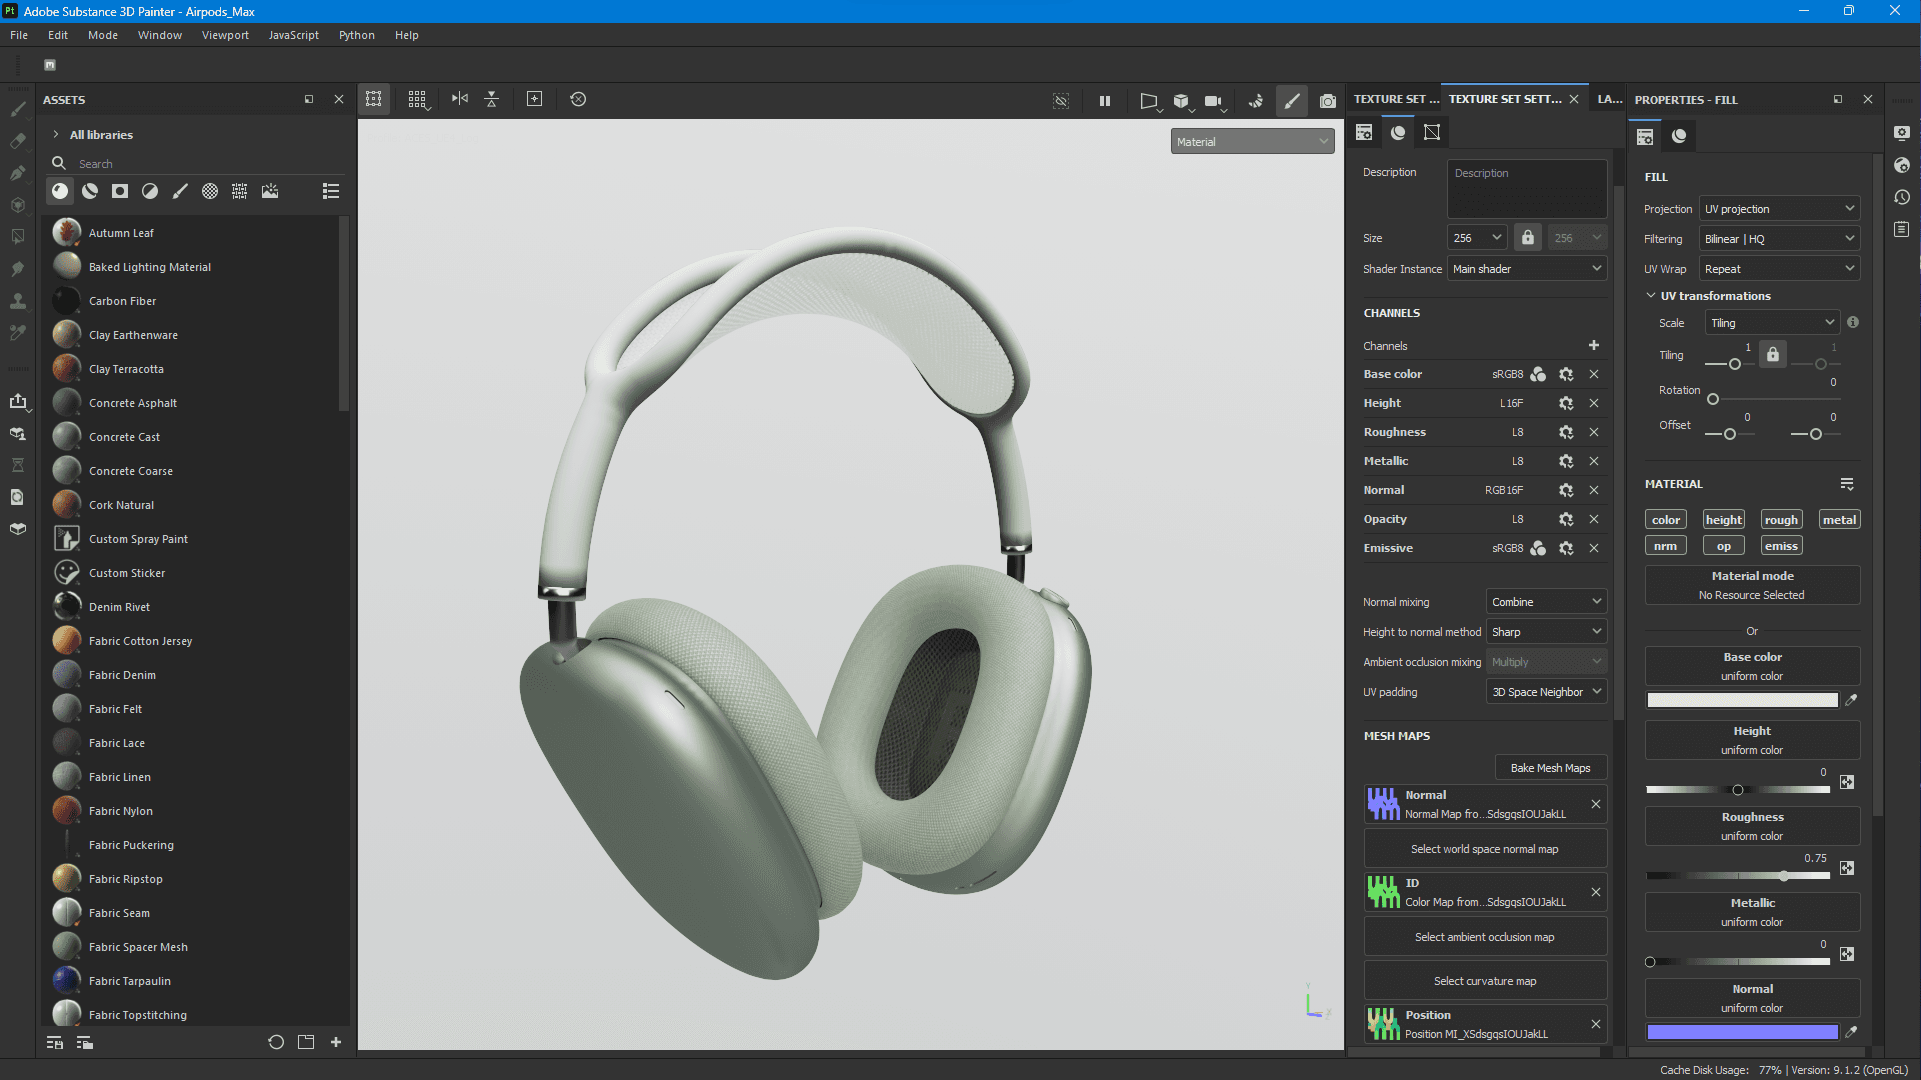
Ensure that your 3D model is fully prepared and that you've applied all the desired materials and textures in Substance Painter. The quality of your USDz file will depend on how well you've finalized these materials, so take your time to perfect your model.
Step 1: Navigate to Export Textures
Once your project is ready for export:
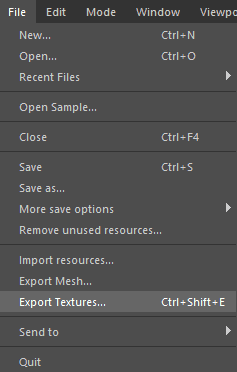
Click on File in the top menu.
Select Export Textures from the dropdown menu. This will open the export window where you will configure your export settings.
Step 2: Configure Your Export Settings
In the export window, you'll see several options. Here's how to proceed:
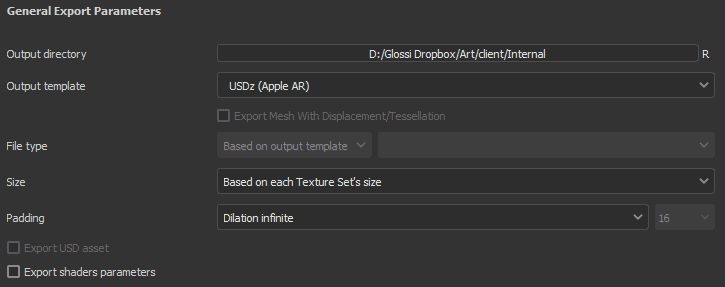
Output Directory
Click the Output directory field and navigate to where you want your USDz file to be saved. This is where you'll find the file once the export process is completed.
Output Template
Open the Output template dropdown menu.
Select USDz (Apple AR). This option is specifically tailored for creating files compatible with augmented reality applications on Apple devices, ensuring your model looks great in Glossi's virtual studio.
Step 3: Export Your File & Upload
With your settings configured, Click the Export button. Substance Painter will now process your 3D model and textures, packaging them into a USDz file. It will also save the baked textures and a USDc in the same directory, so don't be alarmed when you see more files than you were expecting.
Once the export process is complete, your file is ready to be uploaded to Glossi. Navigate to the output directory you selected earlier to find your USDz file. You can now upload this file to Glossi's platform and start creating photorealistic content in real-time.
Troubleshooting
If you encounter any issues or the USDz file doesn't look as expected, here are a few things to check:
Materials and Textures: Ensure all materials are correctly applied and textures are high resolution.
Export Settings: Double-check the export settings, especially the selection of the USDz output template.
Software Updates: Make sure your version of Substance Painter is up to date, as newer versions may offer improved USDz support.
Glossi currently limits upload file sizes to 80MB. If your USDz exceeds that limit, you have a few options.
See our documentation for optimizing your mesh in your 3D modeling software of choice,
Very high resolution textures add a lot to file sizes and in some cases are not necessary. In your Substance project's Texture Set Settings try lowering the size of individual texture sets while watching for any noticeable drop in the texture quality. Don't be afraid to limit textures with little to no detail to 128. If it still looks good, GREAT, and you just saved yourself some MBs.

If your file still exceeds the limit, take a look at our documentation on third party USDz file compression.
Need More Help?
If you're still facing difficulties or have any questions, don't hesitate to reach out to our support team. We're here to help you make the most out of Glossi's platform.
Here's a step-by-step guide on how to export your 3D files as high-quality USDz files from Substance Painter, making them ready for upload into Glossi's system. This guide is designed for beginners, so we'll keep things straightforward and easy to follow.
Before You Start
Ensure that your 3D model is fully prepared and that you've applied all the desired materials and textures in Substance Painter. The quality of your USDz file will depend on how well you've finalized these materials, so take your time to perfect your model.
Step 1: Navigate to Export Textures
Once your project is ready for export:
Click on File in the top menu.
Select Export Textures from the dropdown menu. This will open the export window where you will configure your export settings.
Step 2: Configure Your Export Settings
In the export window, you'll see several options. Here's how to proceed:
Output Directory
Click the Output directory field and navigate to where you want your USDz file to be saved. This is where you'll find the file once the export process is completed.
Output Template
Open the Output template dropdown menu.
Select USDz (Apple AR). This option is specifically tailored for creating files compatible with augmented reality applications on Apple devices, ensuring your model looks great in Glossi's virtual studio.
Step 3: Export Your File & Upload
With your settings configured, Click the Export button. Substance Painter will now process your 3D model and textures, packaging them into a USDz file. It will also save the baked textures and a USDc in the same directory, so don't be alarmed when you see more files than you were expecting.
Once the export process is complete, your file is ready to be uploaded to Glossi. Navigate to the output directory you selected earlier to find your USDz file. You can now upload this file to Glossi's platform and start creating photorealistic content in real-time.
Troubleshooting
If you encounter any issues or the USDz file doesn't look as expected, here are a few things to check:
Materials and Textures: Ensure all materials are correctly applied and textures are high resolution.
Export Settings: Double-check the export settings, especially the selection of the USDz output template.
Software Updates: Make sure your version of Substance Painter is up to date, as newer versions may offer improved USDz support.
Glossi currently limits upload file sizes to 80MB. If your USDz exceeds that limit, you have a few options.
See our documentation for optimizing your mesh in your 3D modeling software of choice,
Very high resolution textures add a lot to file sizes and in some cases are not necessary. In your Substance project's Texture Set Settings try lowering the size of individual texture sets while watching for any noticeable drop in the texture quality. Don't be afraid to limit textures with little to no detail to 128. If it still looks good, GREAT, and you just saved yourself some MBs.
If your file still exceeds the limit, take a look at our documentation on third party USDz file compression.
Need More Help?
If you're still facing difficulties or have any questions, don't hesitate to reach out to our support team. We're here to help you make the most out of Glossi's platform.